
Graphify
An Agent Skill that turns code, documentation, SQL, configuration, PDFs, and media into a queryable knowledge graph, using deterministic local AST extraction for code and provenance labels for relationships.
Project overview
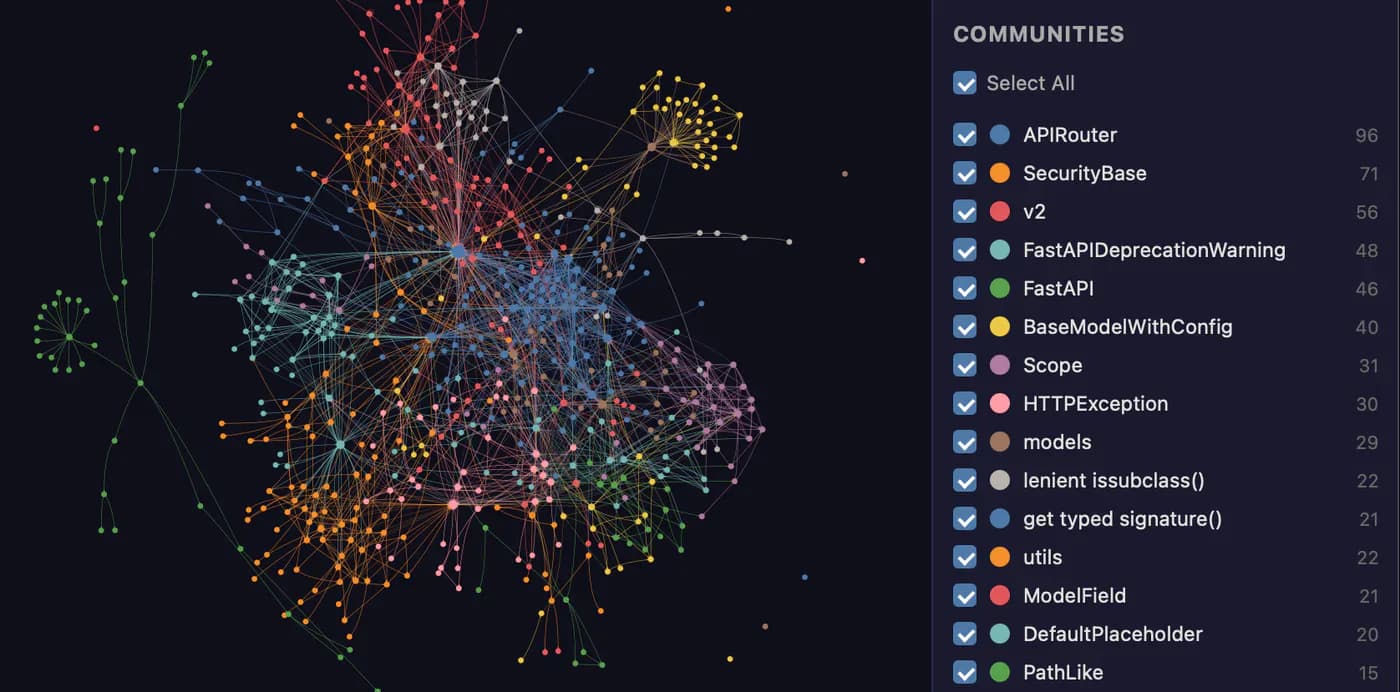
Graphify is an Agent Skill and Python tool for codebase understanding and cross-source research. It uses tree-sitter to extract code, SQL, and configuration structure locally, then can ask the host agent or a configured model to process documents, PDFs, images, and transcripts. The merged graph labels relationships as extracted, inferred, or ambiguous so users can trace how an answer was formed.
Core capabilities
Multilingual structural extraction
tree-sitter and dedicated parsers extract functions, types, imports, calls, and data relationships from code, SQL, manifests, and configuration without executing analyzed source.
Mixed-corpus knowledge graphs
Code structure is merged with documents, PDFs, images, and local transcripts, while Leiden community detection groups related nodes.
Query, path, and explain
The query, path, and explain commands retrieve related subgraphs, shortest paths, and node explanations without rereading the entire corpus each time.
Auditable relationships and exports
Edges carry EXTRACTED, INFERRED, or AMBIGUOUS labels, and graphs can be exported to HTML, JSON, SVG, GraphML, Obsidian, Neo4j, Wiki, and other targets.
Installation and usage
Install the graphifyy PyPI package with uv, add the Skill for the target agent, then build a first graph from a non-sensitive test repository and verify it with query.
Let an AI Agent install it
Send this prompt to Codex, Claude Code, or another AI agent that can work with your local environment.
Help me install and minimally verify Graphify from https://github.com/Graphify-Labs/graphify. First read README.md, pyproject.toml, SECURITY.md, graphify/install.py, and the relevant host Skill on the v8 branch. Confirm Python is at least 3.10, note that the PyPI package is graphifyy, and explain which Skill, AGENTS.md, host configuration, and graphify-out paths would be written. Prefer `uv tool install graphifyy`. If this is a project-scoped Codex setup, then run `graphify install --project --platform codex`, but show the changes and ask before merging an existing AGENTS.md or .codex/hooks.json. Do not inspect production secrets or sensitive corpora. After installation, check the version, run `graphify .` in a small non-sensitive repository, confirm the three default outputs, and execute one query. Ask before requesting credentials or extra permissions, exposing a network service, sending content to a model, connecting to a database, enabling hooks, or overwriting files. Report the installed version, changed files, verification results, and anything not tested.- Python 3.10 or newer
- The uv tool manager with its tool bin directory on PATH
- Write access to the target project and agent configuration directories
- A reviewed data boundary for the host agent or model provider if documents or media will be processed
uv tool install graphifyy- 1Install the CLI and check its version
Run `uv tool install graphifyy`, make sure uv's tool bin directory is on PATH, and then run `graphify --version`.
- 2Register the project-scoped Skill for Codex
After reviewing the write scope from the project root, run `graphify install --project --platform codex` and inspect the new or merged AGENTS.md, .codex configuration, and Skill files.
- 3Build a graph from a non-sensitive repository
Enter a test repository and run `graphify .`. Code-only projects use local AST extraction; confirm the model and data boundary before including documents or images.
- 4Inspect outputs and ask a question
Confirm graph.html, graph.json, and GRAPH_REPORT.md in graphify-out, then run `graphify query "Where is the main entry point?"` to verify the retrieval path.
Run graphify --version to confirm the CLI is available. In a small non-sensitive repository, run graphify . and confirm that graphify-out/graph.html, graph.json, and GRAPH_REPORT.md were created. Then run graphify query "Where is the main entry point?" and check that the result references nodes from the graph.
- The PyPI package is graphifyy, while the installed command is graphify.
- Codex invokes the Skill as $graphify; parallel semantic extraction also requires multi_agent in the Codex configuration.
- A code-only corpus can use local AST extraction. Choose a data-appropriate backend before processing documents or media.
- Install optional extras such as pdf, office, video, mcp, neo4j, or ollama only when needed.
Use cases
Onboarding to an unfamiliar repository
Map modules, entry points, calls, and dependencies before asking an agent focused architecture questions.
Joint code and document research
Merge source, SQL, design documents, and papers to inspect cross-source links between implementation and explanation.
Incremental navigation after changes
Use content-hash caching and updates to rebuild changed material while preserving queryable project context across sessions.
Assessment
Based on the README, architecture and internals docs, security policy, installer source, and query-log source, Graphify's main advantage is combining deterministic code structure with optional semantic material in one traceable graph and exposing that workflow through several agent hosts. It remains a 0.9-series project, and users should review host configuration writes, model data boundaries, and documentation drift before adoption. This assessment is not based on a hands-on installation.
Why it may be useful
- Code structure is parsed locally without executing target source, and code-only use does not require a model.
- Relationship provenance and confidence labels make query results easier to audit than unattributed summaries.
- Installation, architecture, security, examples, and multi-host documentation are substantial, with active releases.
What to know first
- The 0.9-series interface and behavior may still change.
- Semantic quality, cost, and privacy for non-code material depend on the selected host agent or model backend.
- Query-logging and supported-security-version documentation contain stale or conflicting descriptions that should be checked against current source.
README
Graphify
Overview
An Agent Skill that turns code, documentation, SQL, configuration, PDFs, and media into a queryable knowledge graph, using deterministic local AST extraction for code and provenance labels for relationships. Turn any codebase, with its docs, SQL schemas, configs, and PDFs, into a queryable knowledge graph. A /graphify skill for Claude Code, Cursor, Codex, and Gemini CLI: local deterministic AST parsing, every edge explained, no vector store.
Getting started
- Install the graphifyy PyPI package with uv, add the Skill for the target agent, then build a first graph from a non-sensitive test repository and verify it with query.
- Code, SQL, and configuration are primarily handled by local deterministic parsers; a code-only corpus needs no model or API key.
- Documents, PDFs, images, and transcripts enter semantic extraction through the host agent, a cloud provider, or a local Ollama backend.
- Run graphify --version to confirm the CLI is available. In a small non-sensitive repository, run graphify . and confirm that graphify-out/graph.html, graph.json, and GRAPH_REPORT.md were created. Then run graphify query "Where is the main entry point?" and check that the result references nodes from the graph.
Configuration
uv tool install graphifyy