
Secure MCP Tunnel client
OpenAI's self-hosted client for connecting private or localhost MCP servers to ChatGPT, Codex, the Responses API, and AgentKit through Secure MCP Tunnel without exposing the MCP listener to the public internet.
Project overview
Secure MCP Tunnel client is OpenAI's customer-run daemon for connecting a laptop, VM, Kubernetes cluster, or private network to OpenAI Secure MCP Tunnel. It uses outbound HTTPS long polling, receives requests for a tunnel, and forwards them to a local stdio or Streamable HTTP MCP server. This avoids a public MCP listener, but MCP requests, tool arguments, responses, and parts of OAuth still cross the OpenAI product runtime and tunnel-service. Named profiles, doctor checks, health and readiness endpoints, metrics, a local admin UI, proxy and private-CA support, and a Codex runtime plugin make the operational surface unusually complete. It fits teams that can review identity, data flow, and deployment boundaries before production use.
Core capabilities
Outbound private MCP bridge
The customer-run client long-polls tunnel-service and forwards MCP JSON-RPC for one tunnel to the configured private main binding.
stdio and Streamable HTTP
The main channel can launch a local child process or call an HTTP(S) MCP URL. HTTP also supports Unix sockets, proxies, custom trust, and mTLS.
Profiles and preflight diagnostics
init creates a validated named profile, while doctor --explain checks configuration, control-plane access, and MCP probes before startup.
Codex runtime management
The bundled tunnel-mcp plugin delegates create, connect, list, status, stop, and cleanup to native runtime commands.
Observability and local UI
Liveness, readiness, metrics, logs, and a local admin interface expose channel, control-plane, proxy, and process status.
OAuth and multi-replica support
The connector path supports protected-resource discovery and Harpoon routing; v0.0.14 adds MCP 2026-07-28 OAuth and multi-replica Harpoon behavior.
Setup and connection
On macOS, install with Homebrew, confirm the Tunnels permission split, prepare a tunnel ID, a separate runtime API key, and a private MCP endpoint, then generate a profile, run doctor --explain, and start either a foreground or Codex-managed runtime.
Let an AI Agent install it
Send this prompt to Codex, Claude Code, or another AI agent that can work with your local environment.
Install Secure MCP Tunnel client from https://github.com/openai/tunnel-client. First read README.md, docs/onboarding.md, docs/permissions.md, docs/architecture.md, and docs/configuration.md. On macOS use brew install openai/tools/tunnel-client; do not download an unnotarized ZIP or bypass Gatekeeper. Confirm that I have OpenAI Tunnels access, a target tunnel ID, and a separate runtime API key with only Tunnels Read and Use. Never ask me to paste a key in chat or store it literally in argv, profiles, or logs; use env: or file: references. Confirm whether the private MCP uses stdio or Streamable HTTP, create a named profile with init, run doctor --explain, then start the runtime. Report success only after /healthz, /readyz, and control-plane polling are healthy, followed by one side-effect-free check. Ask before creating a tunnel, using an admin key, exposing a remote UI, changing firewall rules, installing a system service, or sending real business data.- macOS and Homebrew, or a release/source-build path documented for another platform
- Provisioned OpenAI Tunnels access and an existing or assigned tunnel ID
- A separate runtime API key with Tunnels Read and Use; do not use an admin key for the daemon
- A stdio command or Streamable HTTP MCP URL reachable from the tunnel-client host
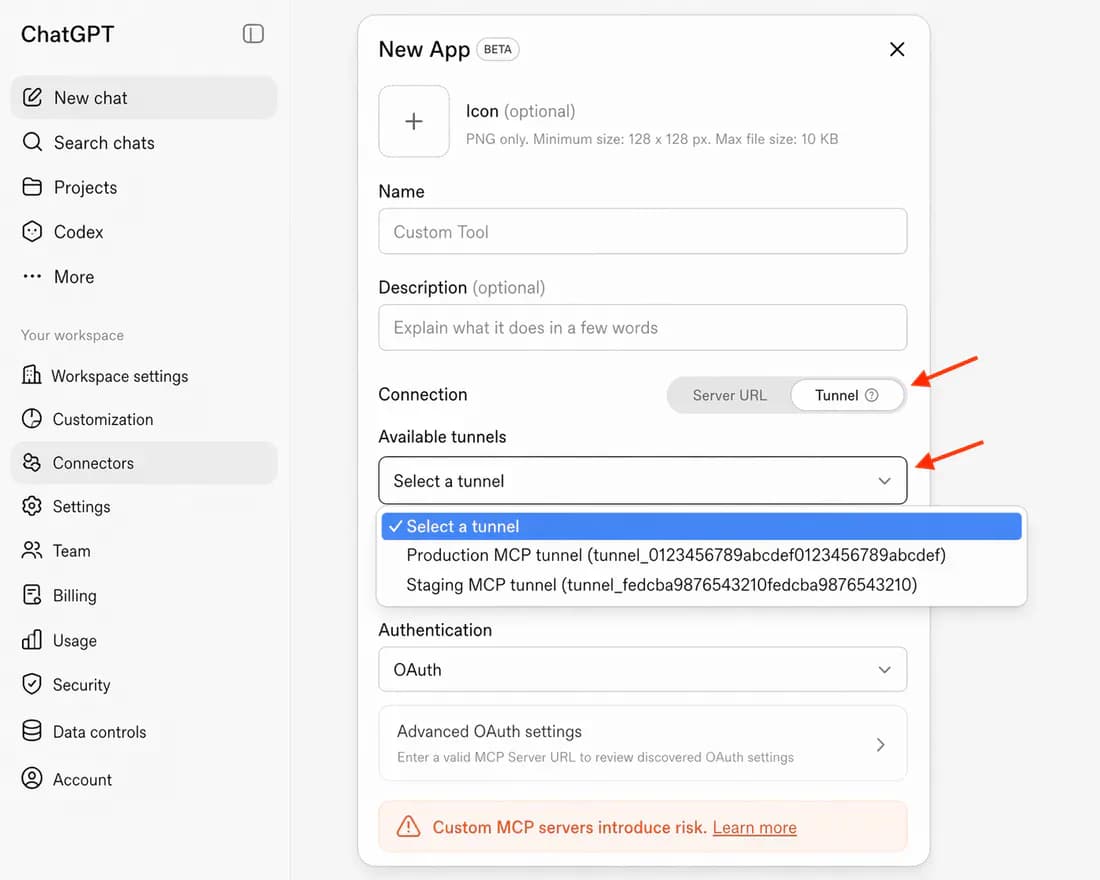
- For ChatGPT, connector administration and tunnel visibility for the target workspace
brew install openai/tools/tunnel-client- 1Install and confirm the version
Run brew install openai/tools/tunnel-client, then tunnel-client --version and tunnel-client help quickstart. The latest stable release reviewed on 2026-09-09 was v0.0.14.
- 2Prepare a least-privilege tunnel identity
Confirm an existing tunnel ID and create a runtime API key with Tunnels Read and Use. Reserve separately stored admin credentials for tunnel creation or updates.
- 3Create a named profile
For a local stdio MCP, run tunnel-client init --sample sample_mcp_stdio_local --profile local-stdio --tunnel-id tunnel_... --mcp-command "python /path/to/server.py". Keep the real runtime key in an environment or file reference.
- 4Run preflight diagnostics
Run tunnel-client doctor --profile local-stdio --explain and resolve tunnel permission, control-plane, MCP launch, or OAuth discovery failures before starting the daemon.
- 5Start and check readiness
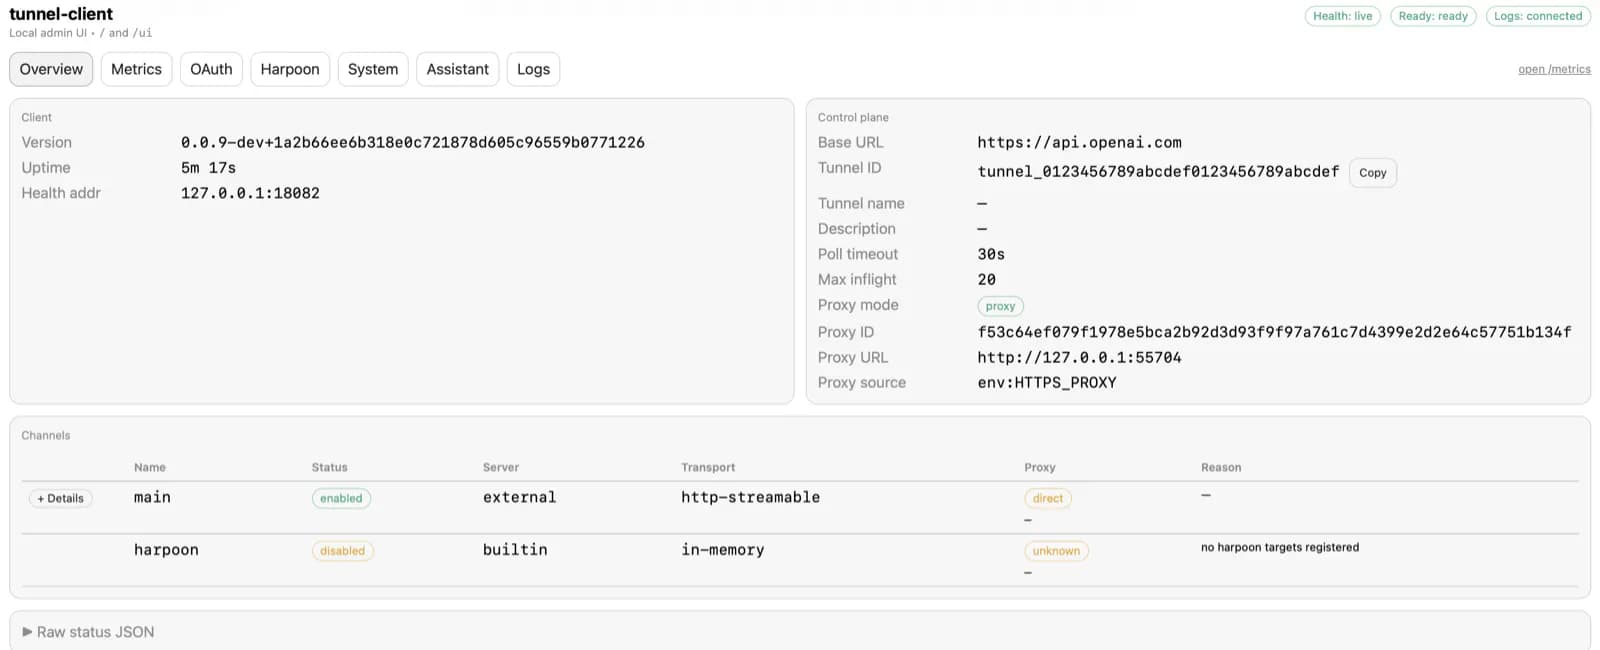
Use tunnel-client run --profile local-stdio for foreground testing. Check /healthz, /readyz, and /metrics. For Codex-managed persistence, use runtimes connect and then runtimes status <alias>.
- 6Perform a minimum product-side check
Select the Tunnel in ChatGPT or call it from Codex, Responses API, or AgentKit. Run tools/list or one read-only tool and verify target, returned scope, OAuth behavior, and redaction.
Run tunnel-client --version, tunnel-client doctor --profile local-stdio --explain, and tunnel-client run --profile local-stdio. Check /healthz and /readyz at the emitted local address, verify control-plane polling, then run one side-effect-free tools/list or read-only call from the target OpenAI product.
- Homebrew is the supported macOS path. Do not bypass Gatekeeper for direct release ZIPs.
- CONTROL_PLANE_API_KEY is the long-lived runtime credential; OPENAI_ADMIN_KEY is only for tunnel CRUD.
- Use env:VARNAME or file:/path for secret-bearing profile fields.
- Keep the health and admin listener on 127.0.0.1 unless it is independently protected.
- Stopping a local runtime leaves the remote tunnel intact.
Use cases
Private tools in ChatGPT
Keep an intranet MCP endpoint private while exposing an approved tunnel to a controlled ChatGPT workspace connector.
Local stdio MCP in Codex
Use the bundled plugin and runtime commands to manage the child process, profile, health URL, and long-lived client.
Private HTTP MCP bridge
Reach a Streamable HTTP service from a VM, Kubernetes cluster, or dedicated host with proxy, private CA, Unix socket, or mTLS controls.
Controlled OAuth connector
Integrate an OAuth-protected private MCP after reviewing Harpoon, protected-resource metadata, and browser authorization boundaries.
Assessment
The public repository and v0.0.14 release show a strong official client that combines private MCP connectivity, permission separation, profile diagnostics, runtime management, and observability, with unusually detailed release evidence. The crucial caveat is that no public MCP listener does not mean fully local data. MCP payloads cross OpenAI product and tunnel-service infrastructure, and the runtime key authenticates to OpenAI. Use it for governed organizational connectivity, not as a zero-third-party data path.
Why it may be useful
- Official OpenAI implementation with explicit ChatGPT, Codex, Responses API, and AgentKit paths
- No inbound public listener is required for the private MCP server
- stdio and Streamable HTTP plus proxy, private CA, Unix socket, and mTLS support
- doctor, readyz, metrics, local UI, and Codex runtime management improve operability
- Release assets include checksums, provenance, SBOM, vulnerability, and license evidence
What to know first
- Requires OpenAI Tunnels product access and is not a generic tunnel for arbitrary MCP clients
- MCP payloads and some OAuth traffic cross OpenAI and cannot satisfy a fully local boundary
- Direct macOS release ZIPs are unnotarized; Homebrew is the supported path
- No standalone SECURITY.md is present
- This review did not execute an end-to-end tunnel with real credentials
README
Secure MCP Tunnel client
Overview
OpenAI's self-hosted client for connecting private or localhost MCP servers to ChatGPT, Codex, the Responses API, and AgentKit through Secure MCP Tunnel without exposing the MCP listener to the public internet. Customer-run client for Secure MCP Tunnel: connect private or localhost MCP servers to ChatGPT, Codex, the Responses API, and AgentKit without exposing them to the public internet.
Getting started
- On macOS, install with Homebrew, confirm the Tunnels permission split, prepare a tunnel ID, a separate runtime API key, and a private MCP endpoint, then generate a profile, run doctor --explain, and start either a foreground or Codex-managed runtime.
- The client runs in the customer-controlled network and uses OpenAI tunnel poll and response endpoints, so no inbound tunnel port is required.
- Every runtime needs a control-plane API key, tunnel ID, and a main binding through MCP_SERVER_URL or MCP_COMMAND. Precedence is flags, environment, YAML, then defaults.
- Run tunnel-client --version, tunnel-client doctor --profile local-stdio --explain, and tunnel-client run --profile local-stdio. Check /healthz and /readyz at the emitted local address, verify control-plane polling, then run one side-effect-free tools/list or read-only call from the target OpenAI product.
Configuration
brew install openai/tools/tunnel-client